

The short answer is somewhere between $5,000 and $20,000. Each book is different, and requires a different amount of labor - so the cost can vary greatly.
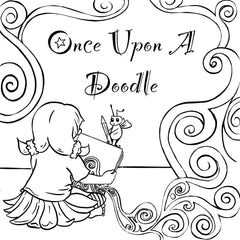
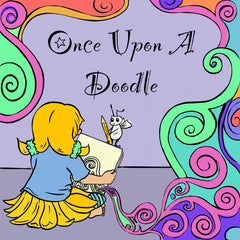
I’ve had several budding authors come to me interested in having me illustrate their work for them, and I wrote this to educate and inform new children’s book authors a bit more about my process and the real cost to hire an illustrator.
First of all, congratulations! Writing a story is a lot of hard work, and even getting to this step is a big deal. Making the decision to hire an illustrator is a big leap,and this is a very exciting time. To make the process go as smoothly as possible for everyone involved, There are several items you will want to have ready when you go to an illustrator for a quote.
The Quote

To provide a quote I will need to know the following:
- Style
- Illustration Count
- Timeline
- Story Premise
- Additional Services
First I will need to know which of my styles you would like the book in. If you want highly detailed hand painted watercolors, each page can take up to 10 hours of painting time(or more) while more simplified images, or digital art, can take a great deal less. Am I doing full illustrations with backgrounds, smaller images meant to go on a white background, a mix of both?


I will need to know how many illustrations I will be doing. Am I doing one illustration per page, or will some pages be blank? How many full page illustrations? How many half-page? How many stand alone images, or embellishments? Will I be doing the front and back cover?
I will need to know what your desired timeline is. This will help me determine where I can fit it into my schedule. Shorter timelines may mean that I have to push your project ahead of others, which could incur a rush fee.
Knowing the story premise will help me get a better picture of the project.
Once I have these details I will give you a quote which includes the project scope, the timeline, and my hourly rate for any work above and beyond the quoted scope. (such as additional revisions, or last minute changes).
We will also decide on which additional services will be included in the quote. If you are not sure, and want to add the services later, they will be billed at my hourly rate. Examples of these services are below:
- Layout and Text - Adding the final text and preparing the final files for printing.
- Branding Materials - banners, color palettes, and other items you will need to have a cohesive brand to sell your book
- Novelty items - I can design things like bookmarks, stickers, coloring pages, and other novelty items that feature images or characters from your book, to use as merchandise or marketing materials.
If you decide to move forward I will send a contract to sign with the project details and payment schedule. Once I have the signed contract and initial payment deposit in hand we can begin creating your illustrations!
Step 1 - Hammering out the details
The Manuscript
I will need a fully completed, edited, final draft of the manuscript. It needs to be a final copy because changes later down the line may be difficult to do and will likely incur extra charges.
You should have it broken out by what text you would like on each page, including the title page, dedication page, copyright page, and any end pages.
A typical children’s book is 32 pages long, but it can also be 24 or 48 pages. It is always in a multiple of 8 due to how the paper is folded during the manufacturing process. If your book is not a multiple of 8, many printers will add extra blank white pages to the end to cover the difference. It tends to look unprofessional, so I highly recommend keeping an eye on your page count.
Technical Details
I recommend, before you go to an illustrator, first choosing what company you will be using to print the book. Different printers offer different sizes and options, and this will be vital information for the illustrator. I have worked with both KDP Publishing and IngramSpark, but there are hundreds of other printers out there, so I suggest doing research into which one is best for your specific needs.
Once you have selected your printer, the information I, as illustrator will need are as follows:
- Printing Company
- Format (hardcover / soft cover / perfect bound / Digital)
- Page Size
- Bleed Requirements
- Dust Jacket
With this information I will map the text layout as it will appear when printed. I can then use this to sketch out the rough draft so that everything flows together well.
Characters and Scenery
I will need descriptions of how you envision the characters and setting. The mood, personality, style, etc. that you pictured in your head when you were writing the book. I will add my own style and bring my own ideas to the table when working on this, but this will make sure I stick to your vision as well.
If you have any reference photos, mood boards, color swatches, these will be VERY helpful. The more you communicate your ideas, the smoother the process will go.
I’ll work up some rough preliminary character sketches. You’ll give me your feedback and I’ll make 2-3 rounds of changes. Any changes beyond this are billed at an hourly rate.

Step 2 - Thumbnail Storyboard
Once we know what the characters are going to look like, I will put together a storyboard showing what each page will look like. These will be rough sketches, to give you an idea of what each page will look like. I will again make 2-3 rounds of changes.

Step 3 - Line drawings
After we have the thumbnails approved we are ready to get into the actual line drawings. These are tightened drawings based on your approved thumbnails. They will be done to size (including any trim and bleed). These will form the basis of the final colored illustrations, so you will want to be sure everything works for you before we move forward. I will again do 2-3 rounds of changes, so be sure to communicate very clearly and concisely what you would like changed.

Step 4 - Color Roughs (optional)
If we have contracted for color roughs, I will take the final lineart and digitally color it very roughly, to give you an idea of the color scheme. This is especially helpful for watercolor illustrations, as once I start painting, I will be unable to make changes to the art. If any changes need to be made the painting will need to be thrown away and started over, which will be charged at my hourly rate.
Step 5 - Painting
The approved drawings and color roughs will be used to create the final paintings.
If we have contracted for digital art, this will be done using ProCreate on my iPad, and you will have 2-3 rounds of minor tweaks.
If we have contracted for watercolor art, I will transfer the approved lineart to watercolor paper and will hand-paint each image, based on the color roughs you have approved. Due to the nature of watercolor paints, colors may not be exact, but I will have them as close as possible.
No tweaks or changes are possible at this point. I will scan the completed paintings, and digitally format them. I will send low-res images for viewing and approval as the pages are completed.

Step 6 - File Delivery
Once the work is completed and the balance paid, I will send you the high resolution files prepared and ready for your printing company. If you have someone to do the layout and text then my work is done! Congratulations, you have an illustrated book!